If you have a DSLR (digital single-lens reflex) or mirrorless camera, you probably already know that photography is just as much science as it is art. Or, maybe you bought a really nice DSLR camera a few years back, and have been using it in auto mode.
I get it. I got my first DSLR camera back in 1999, and used the auto mode for at least a year, because I was too anxious to try all the manual bells and whistles. My first camera was a Canon Rebel, a film SLR, which added another layer of intimidation, and financial burden of constantly buying film as I learned.
Shooting in auto-mode made my images blurry, flat, and always too bright. My exposure was never right. Once I figured it out, I practiced as much as possible, trying out different settings and combinations of shutter speeds and aperture. I was using film, so ISO wasn’t part of the equation, but film speed was. So I tried out different film speeds, as well.
But now we live in the digital age, and film speed is now ISO. This information works for film SLRs as well. Just sub ISO for film speed.
If you want to have your photos look the best, you need to have the right exposure. And to have right exposure, you need to have a basic understanding of those three fundamental components that affect exposure; shutter speed, aperture, and ISO. Understanding these elements, how they work, and how they work in concert with each other, is key to having the right exposure, focus, and depth of field.
Let’s get the terminology out of the way, first.
Exposure - According to the photography experts at Adobe, “Exposure is the amount of light that reaches your camera’s sensor, creating visual data over a period of time.” It is determined by how much light is available and for how long.
Aperture - Aperture is the opening in the lens that allows light into the camera. In the exposure equation, aperture controls the “how much” factor; it is a measure of how wide the opening is. The wider your aperture, the more light that gets in, and visa versa. Aperture is expressed in fractions and are called f-stops. The larger the number, the smaller the opening.
When I was learning this stuff with film, I thought of aperture as an open door inside my lens. The door in my camera lens is always open. So if I close that door 1.4 inches (f/1.4), the door is still wide open, allowing a lot of light through. If I close that door 8 inches (f/8), that door is open just a little bit, allowing less light to get through.
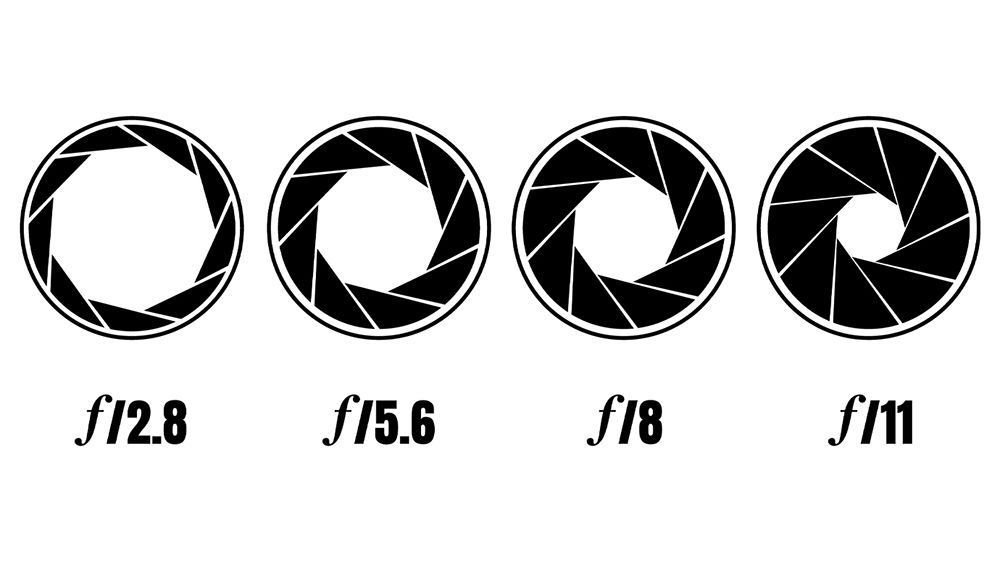
You could also look at aperture as a pupil. When it's dark out, your pupil gets bigger to let more light in. When it's bright out, your pupil doesn't need as much light, so it gets smaller.
Shutter Speed - Your camera's shutter is basically a curtain inside it, that opens up for a certain amount of time to allow data to hit the sensor, capturing the image. Shutter speed therefore, measures the amount of time that curtain is open. This is the “how long” factor.
Shutter speed is measured in fractions of a second. A faster shutter speed keeps the shutter open for a very short time, allowing less light. A slower shutter speed keeps it open for a longer period of time, letting more light in.
The shutter is kind of like your eyelid, opening and closing.
ISO -This is a measure of how sensitive your camera sensor is to the light allowed by the aperture and shutter speed. A lower ISO is less sensitive than a higher ISO. What that means is when there is more light, a lower ISO is used. When there is low light, a higher ISO is used.
Overexposed - Images that are brighter than what your eyes are seeing. This occurs when too much light hits the sensor, or for too long. This is a problem because even the most advanced editing software cannot get back data that has been totally overexposed.
Underexposed - Images that are darker than what your eyes are seeing. This occurs when not enough light hits the sensor.
Light or Exposure Metering - This is measuring the amount of light in a given space with a device called a Light Meter. There are different types of light meters, but they all help your camera to know what the correct exposure is for that area. Many DSLR cameras come with a meter built in, so check to see if yours does. This is an incredibly useful tool, built right into your camera. Without getting too scientific, your light meter is measuring the scene to determine the settings that will bring everything in the image to middle gray.

Middle Gray - 18% of gray, which is the value between black and white that is defined as correct exposure. This is not the center of the black to white spectrum, speaking mathematically, but it’s what our human eyes can perceive as the middle. There will be more about this in the May blog about color space and printing.
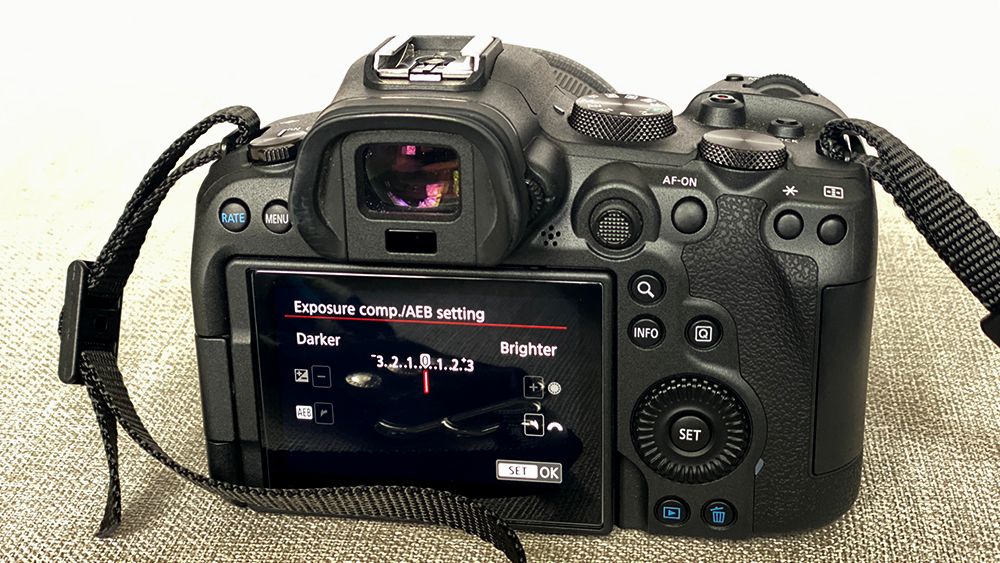
Exposure Compensation - Exposure compensation is a tool on your camera that can override the exposure settings your camera set for a given scene, when metering. Your light meter can get confused when there is a lot of fluctuation between light and dark, so knowing how to use exposure compensation is very helpful.

Histogram - The graph on your camera that shows the brightness of an image.
Exposure Triangle - The three components (aperture, shutter speed, ISO) that work together to create optimal exposure.
Plane of Focus - This refers to the distance from the camera where the subject is most in focus and clear. The plane of focus runs perpendicular to the camera, which is important to know for Depth of Field.
Depth of Field (DoF) - The distance between the closest subjects and the farthest subjects in your image that are "acceptably sharp." Yes, in focus is subjective. Depth of Field is expressed in terms of a narrow DoF or large DoF. A narrow DoF has a smaller length of focus and a large DoF has a larger length of focus.
Shutter Priority - A semi-manual mode on your camera that makes the exposure decisions based on the shutter speed you choose.
Aperture Priority - A semi-manual mode on your camera that makes the exposure decisions based on the aperture you choose.
Bokeh - Background that is seperate from the subject, or blurred background.
Post - Post production, or editing
SOOC - Straight out of the camera
So now what?! What the heck are you supposed to do with all this information?!?
Using the exposure triangle to get the correct exposure is key. Different subjects call for different exposures, thus, different combinations of aperture, shutter speed and ISO. All three settings change the look of your image in different ways.
Light
You get more light by A) having a slower shutter speed, B) having a higher aperture (lower number on the dial) and C) increasing your ISO.
Likewise, you get less light by A) having a faster shutter speed, B) having a lower aperture (higher number on the dial) and C) decreasing your ISO.
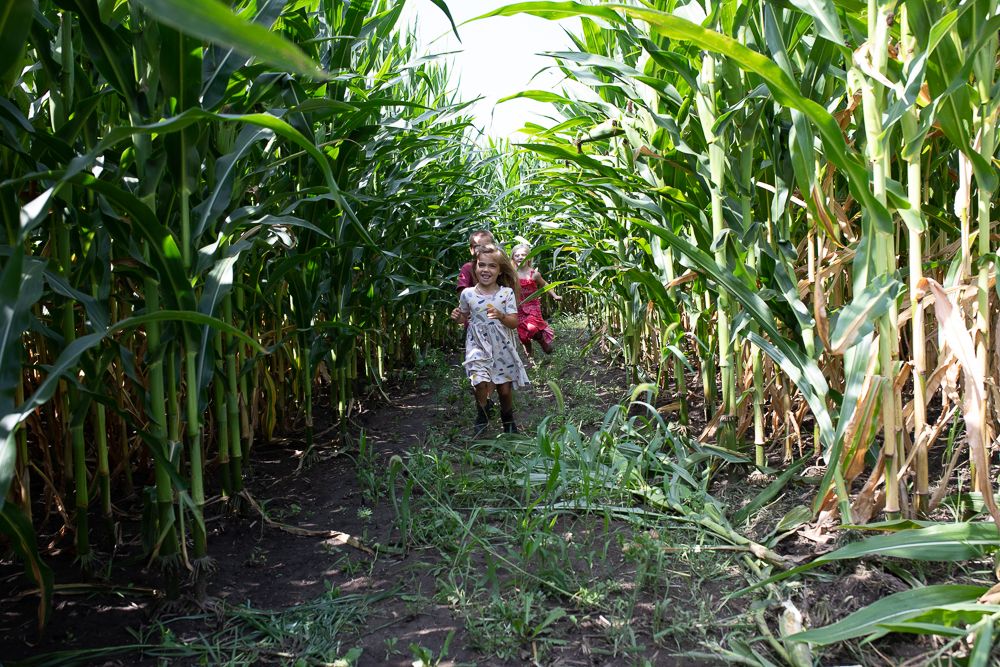
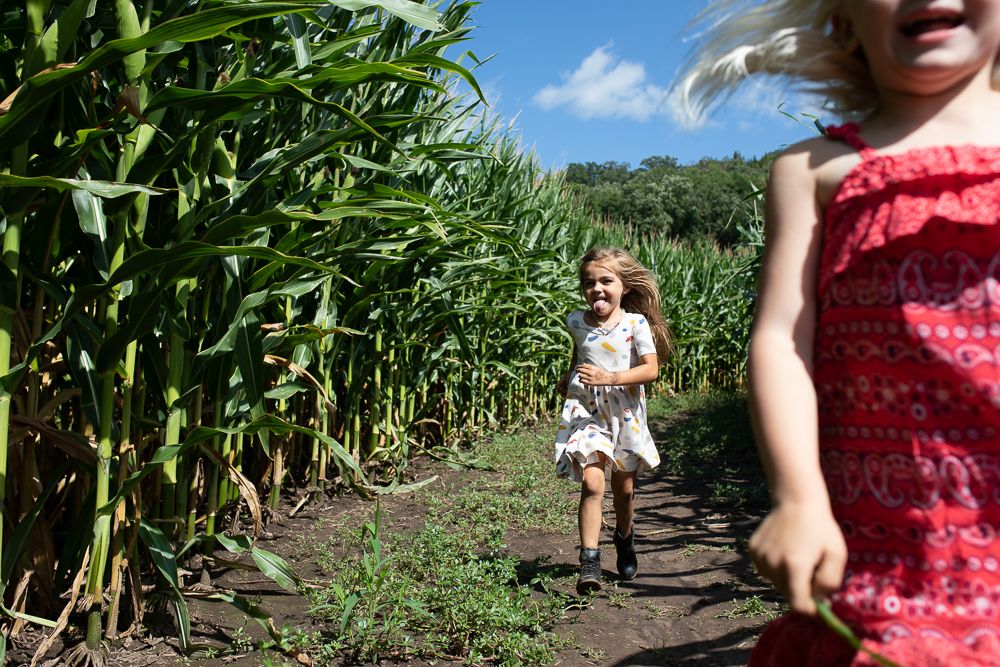
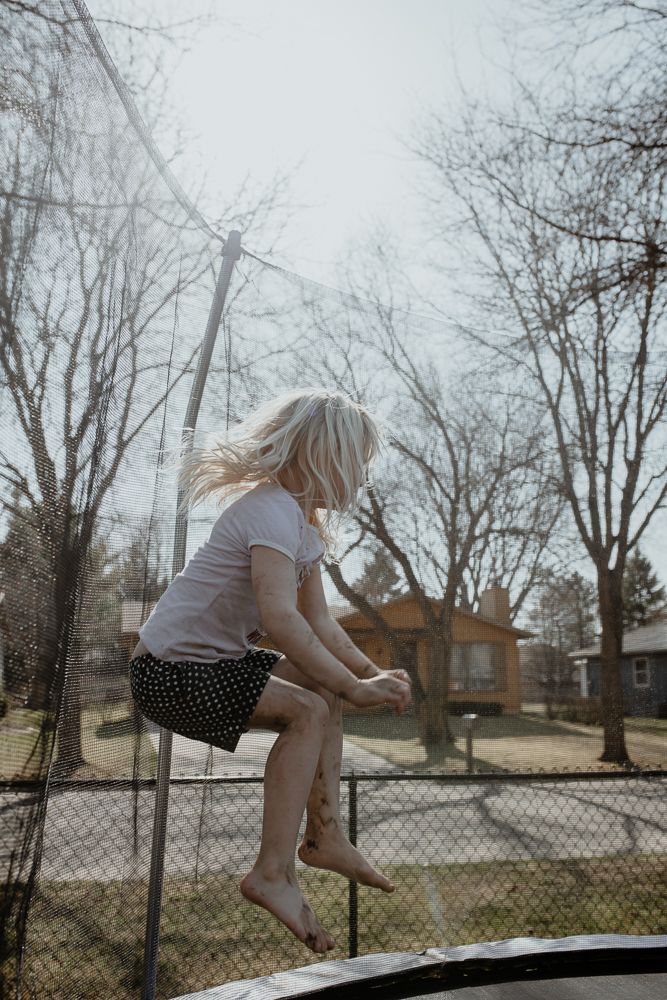
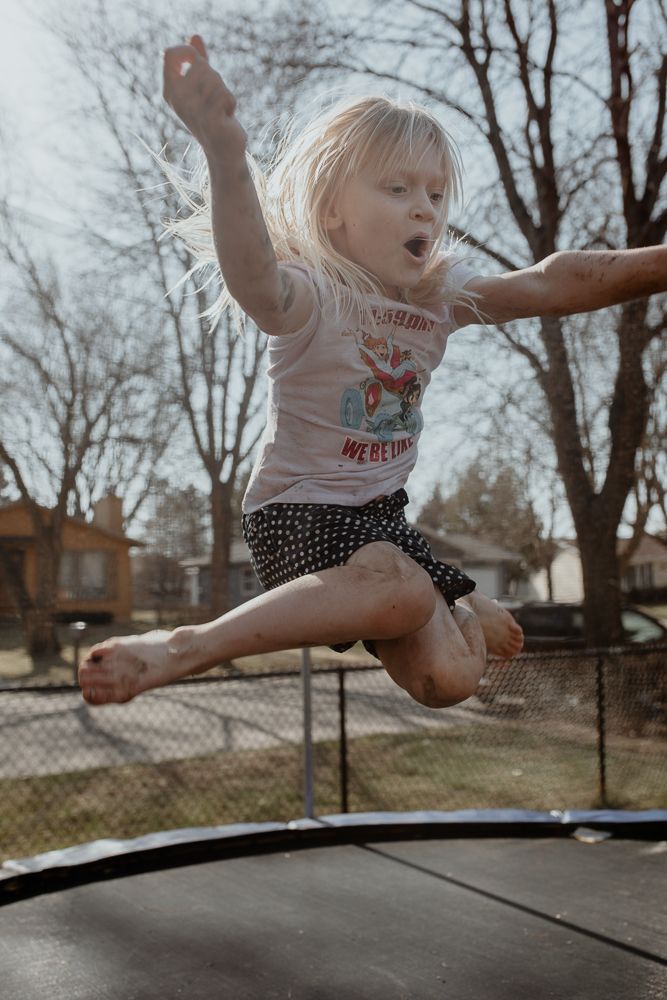
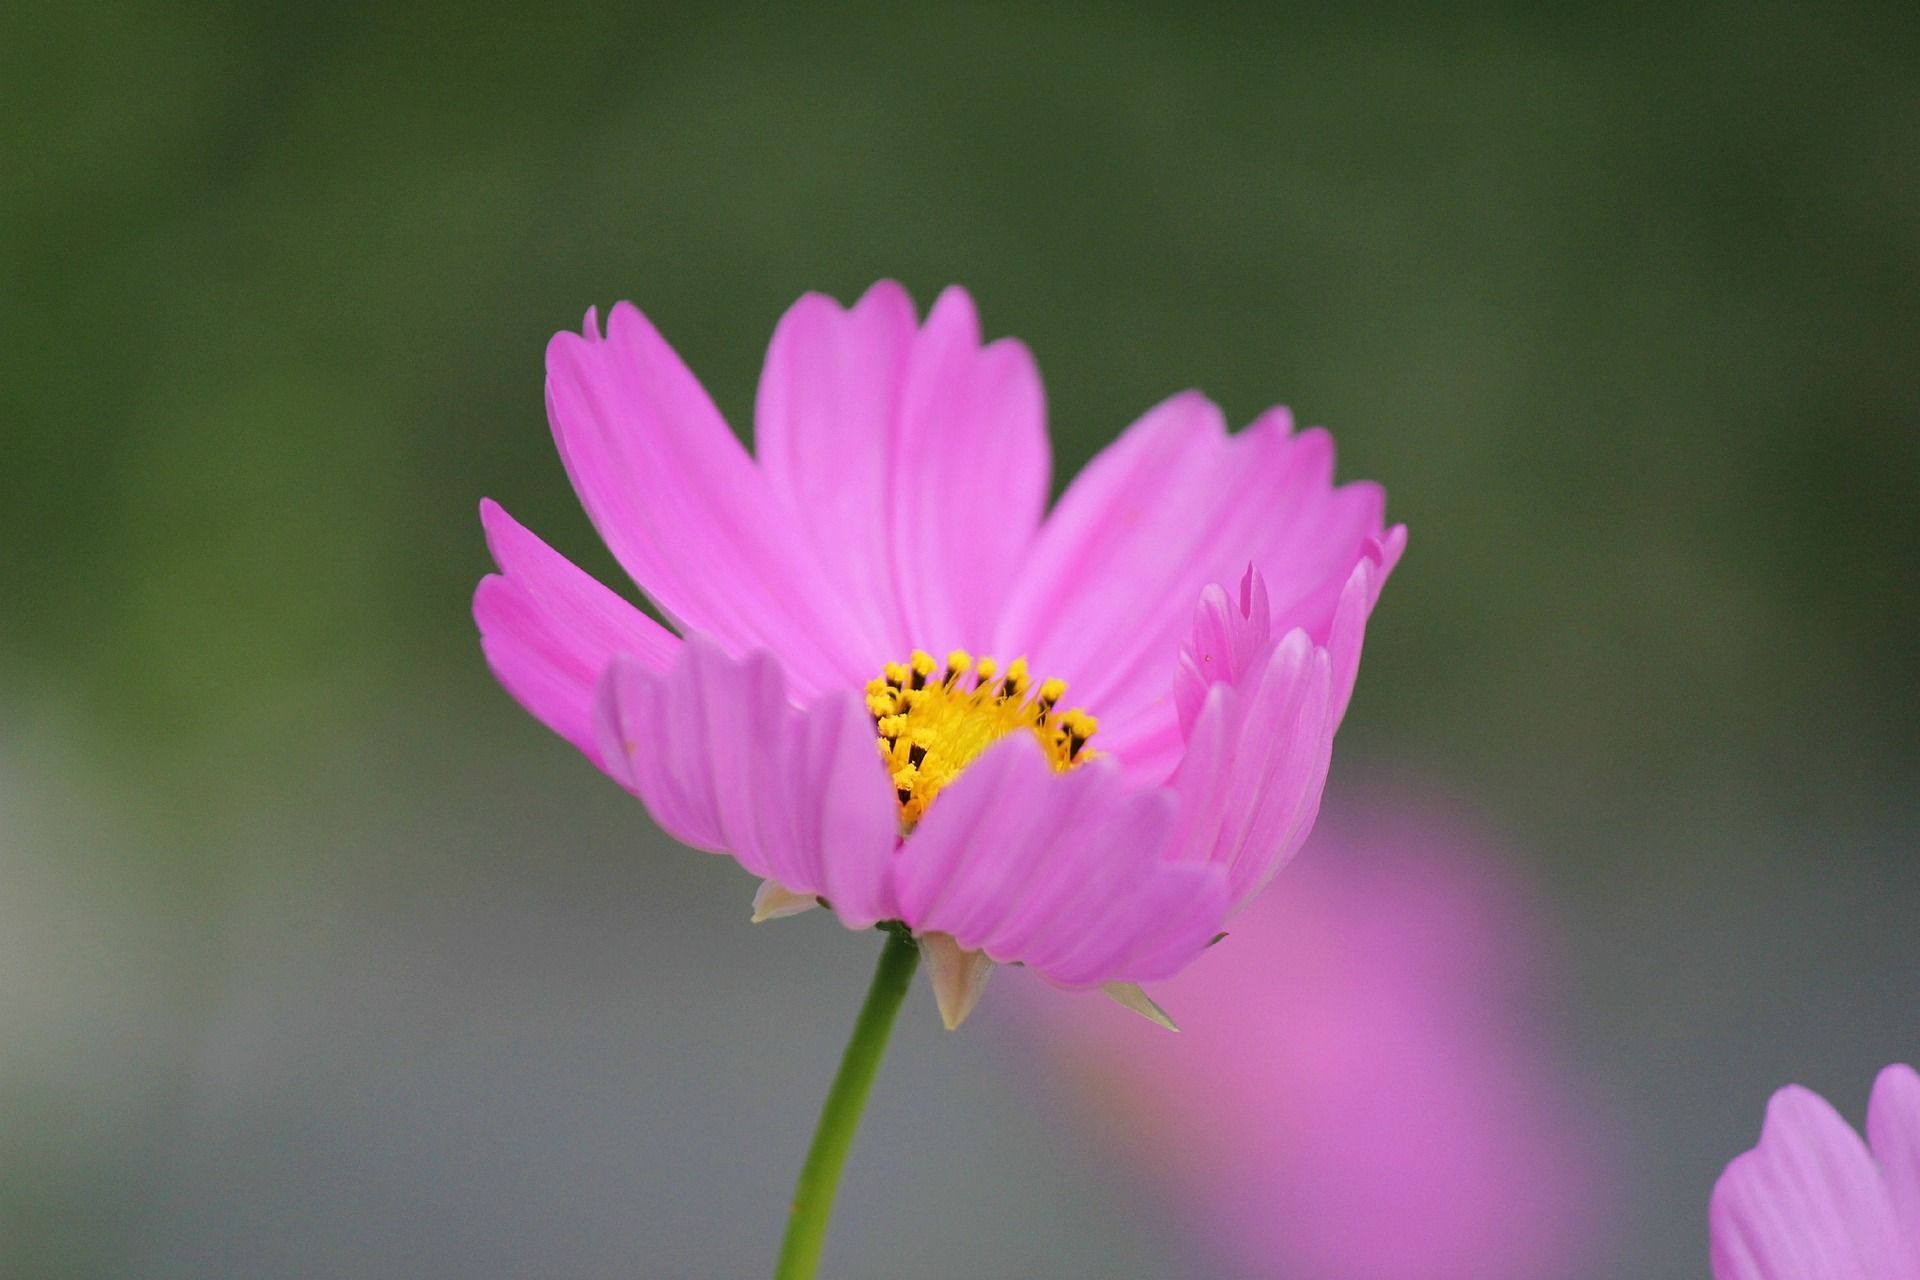
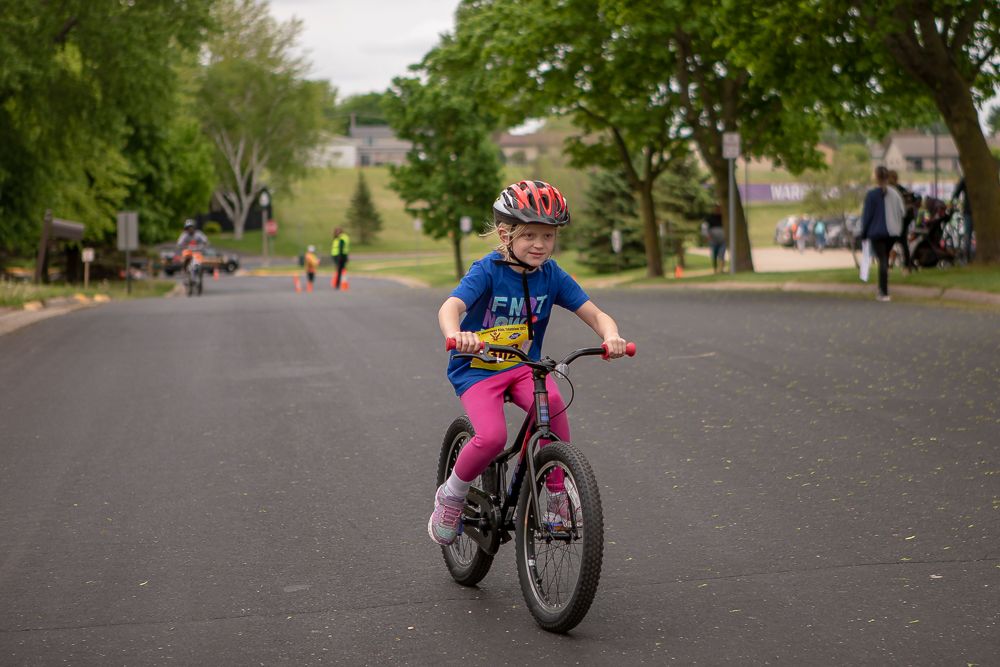
The 1st image: shot at f/5, shutter speed of 1/640 & ISO 500.
The 2nd image: shot at f/5, shutter speed of 640 & ISO of 125.
The biggest difference between these two photos is the highlighted areas, especially the sky. The shadows and midtones are good for both images, but the highlights are overexposed in the first image. Keeping the ISO down was the only setting that needed to be changed to correct the exposure.
Digital cameras are great for experimenting, because you can shoot and see right away what your settings are doing.
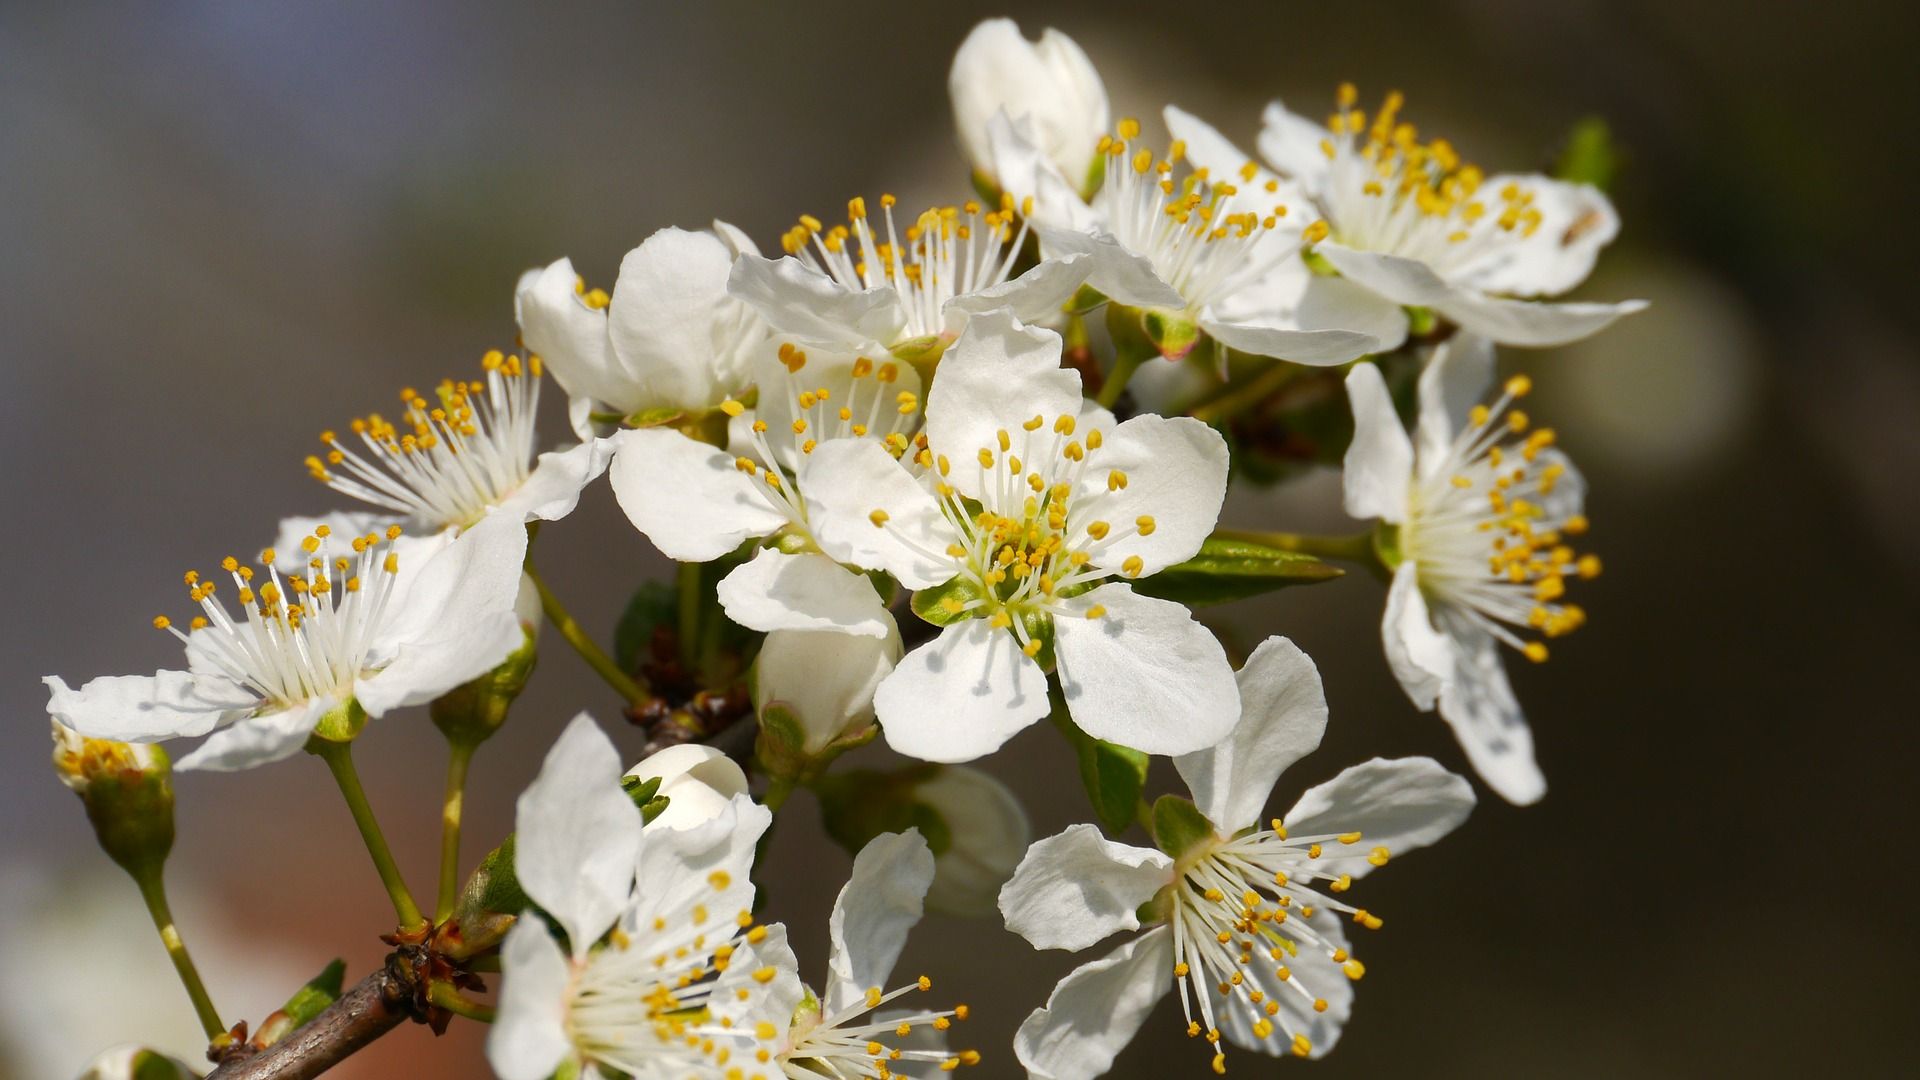
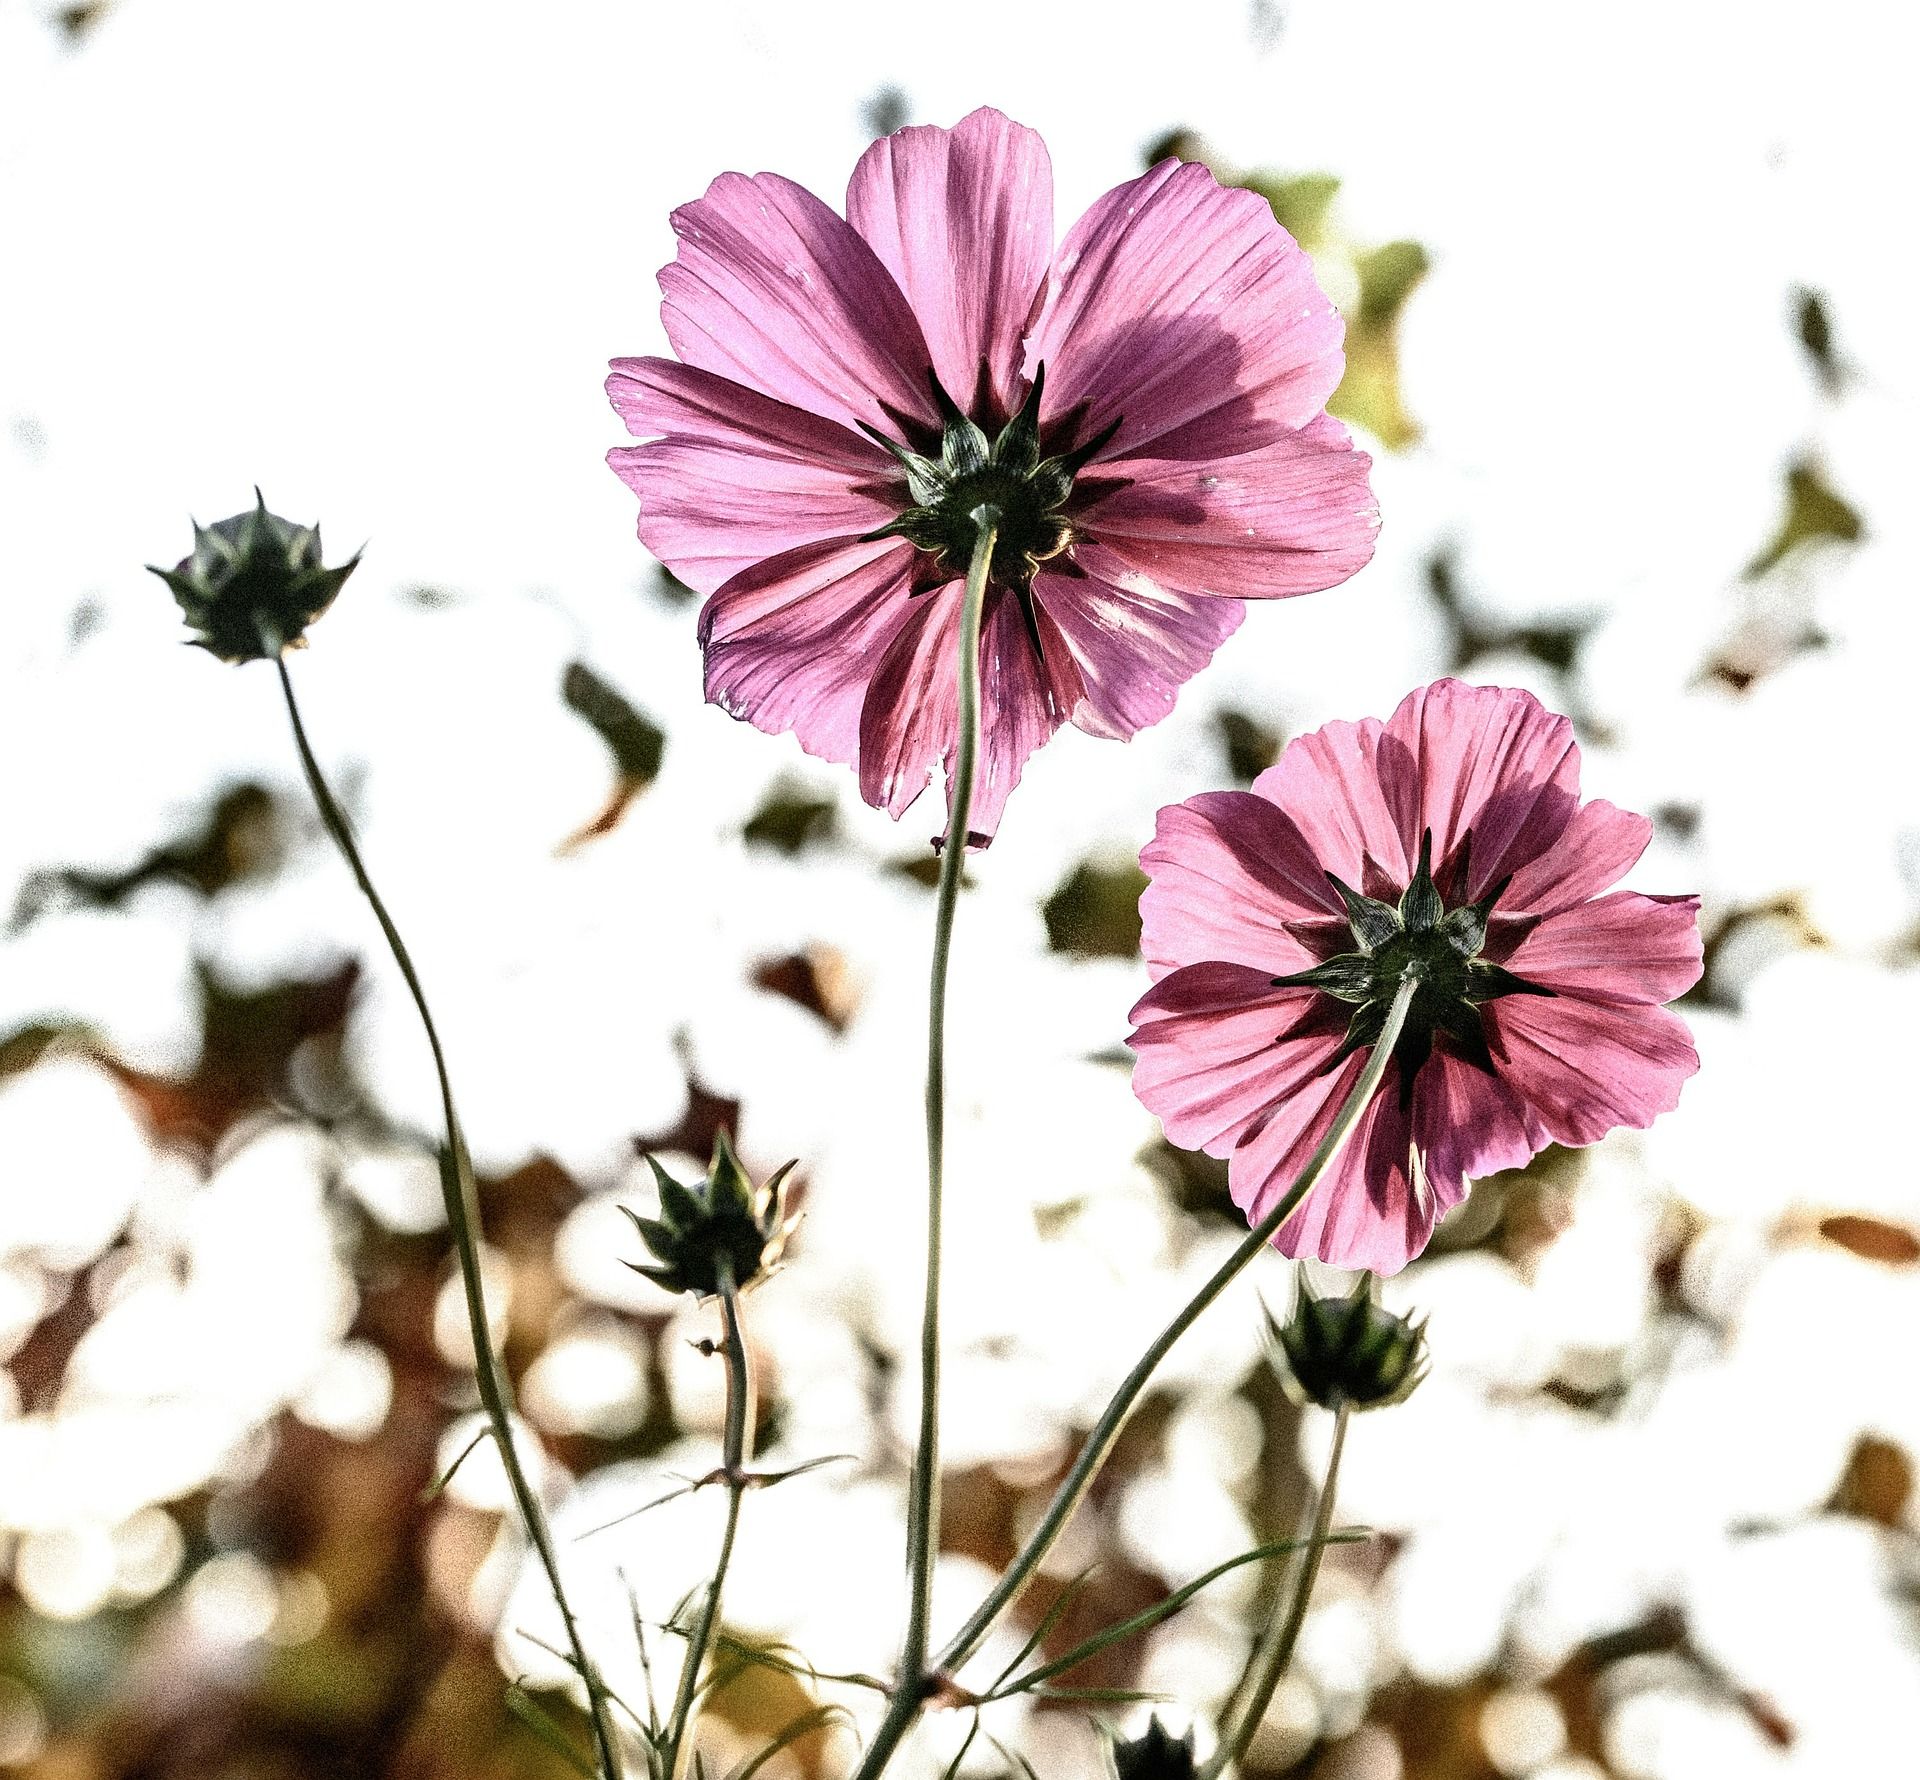
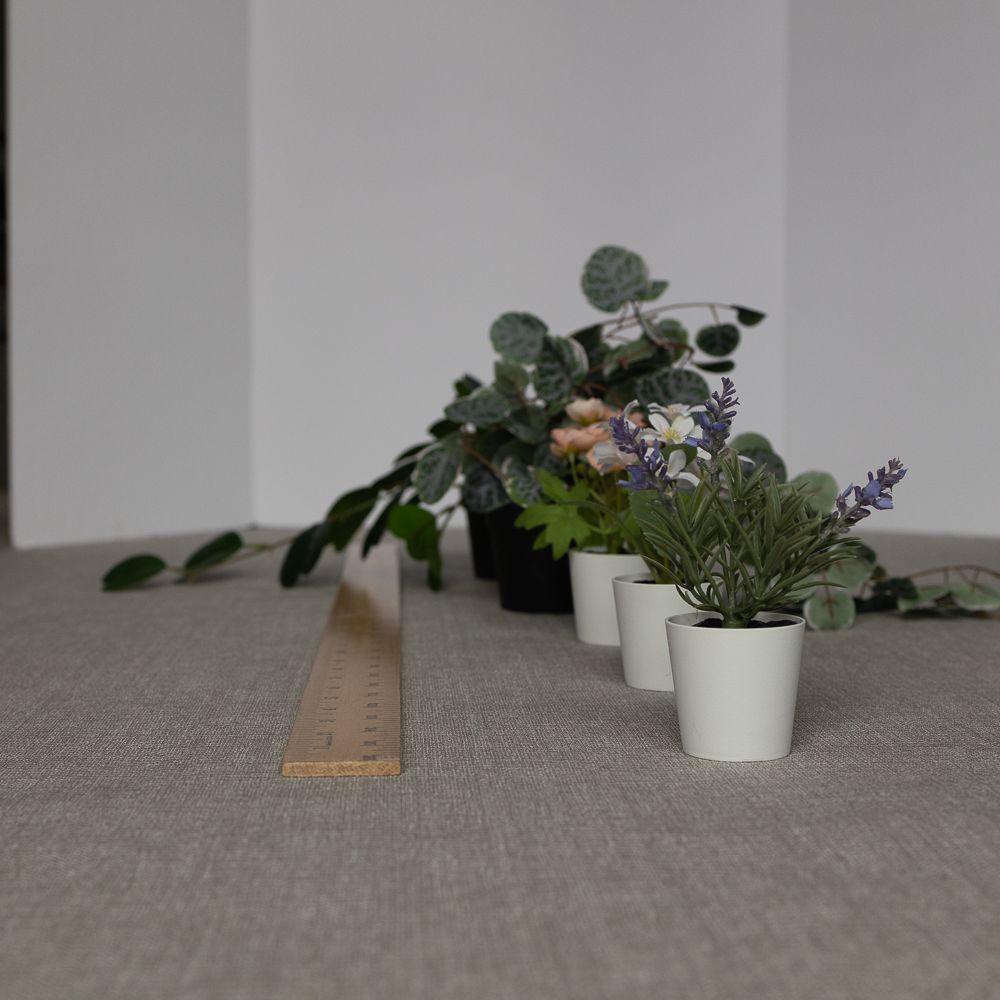
Try This: Start inside your home during a time when there is enough light coming in. Find something to photograph, and set your aperture at the lowest stop available. Keep your shutter around 250, and ISO at 100. You can make a little set up like I did here (literally a white foam poster board for the backdrop and some utility fabric for the floordrop), or just find something with good contrast between the highlights and shadows. Something light and dark. Then practice with upping your ISO, your shutter, and aperture and see what combos work best. Every situation will be different, depending on the lighting. I used natural light on a cloudy day, with a white backdrop and a lighter floor drop. This was done inside my house, which has horrible lighting. There was no editing for these images, other than to resize them for the blog.
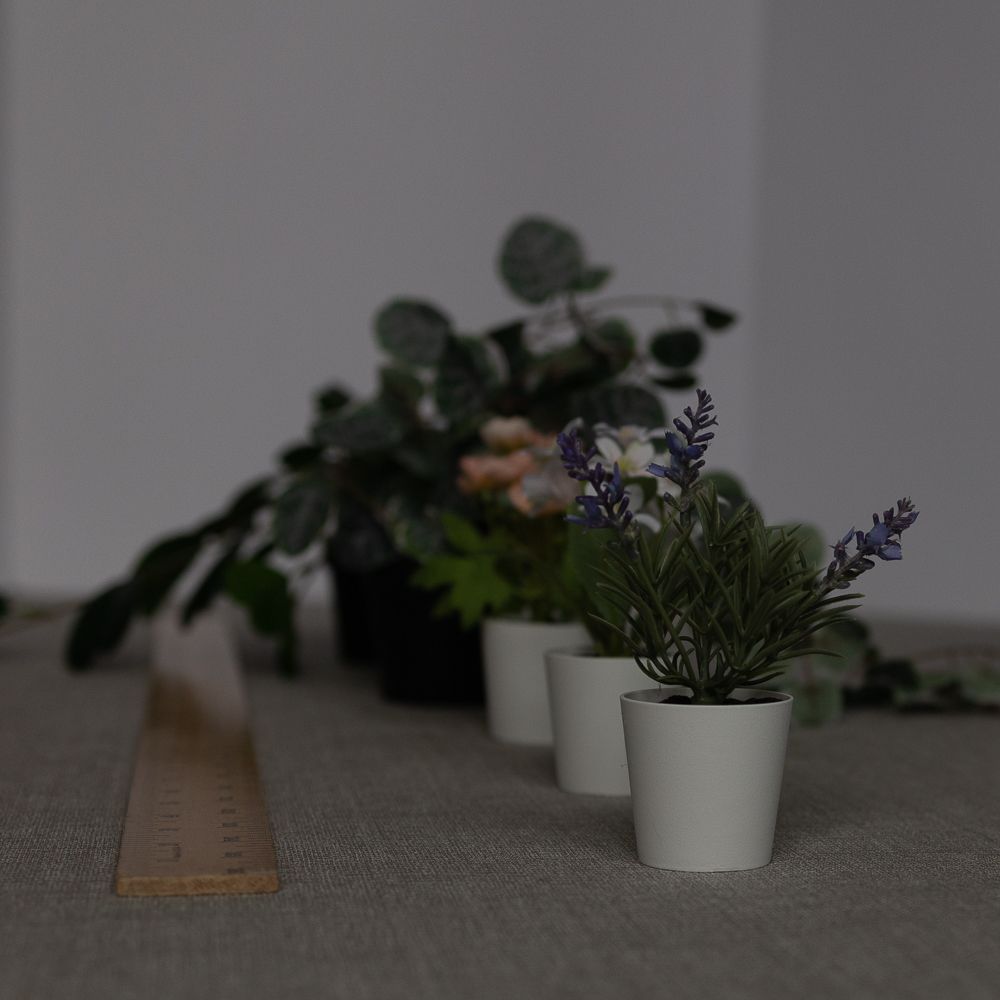
The first image was shot at f/2.8 at 1/800 and ISO of 250. This image is too dark, but has more in focus. It would be fine with a little bit of editing.
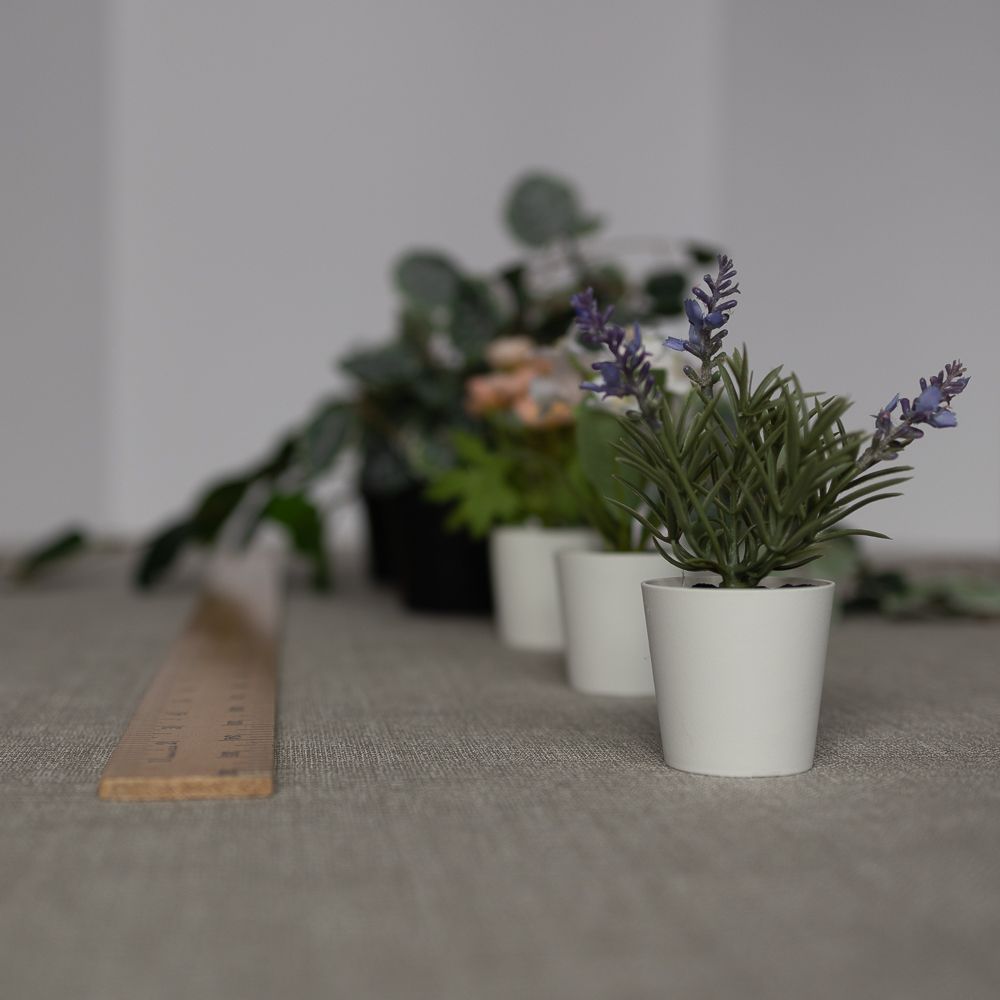
The second was at f/2.8 at 1/250 with and ISO of 100. This image is bright enough, but the focus area is really shallow. You can pretty much see the plane of focus like a straight line! Not subtle enough.
The third was shot at f/5 at 1/250 and ISO of 400. This image has great lighting and great focus area. The highlights are not too bright and the darks are not too dark. The plane of focus is subtle and looks good.
Motion

Shutter speed controls movement, or the blurriness of a subject in a photo. If your shutter is set at 1/250 or faster, you will basically stop time. Keeping your shutter open longer will give you blur, if your subject is moving.
Moving cars on city streets, waterfalls and moving lights are great places for a to try out longer shutter speeds, as well as night photography. Just make sure you have a tripod for anything longer than 1/200, or you will get camera shake and your images will not turn out as planned.
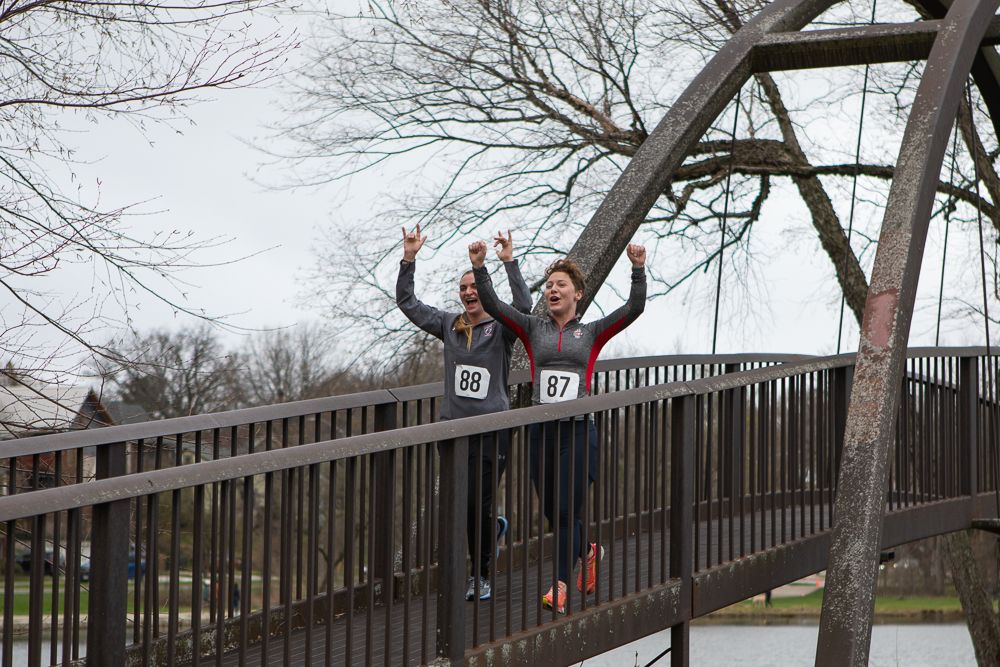
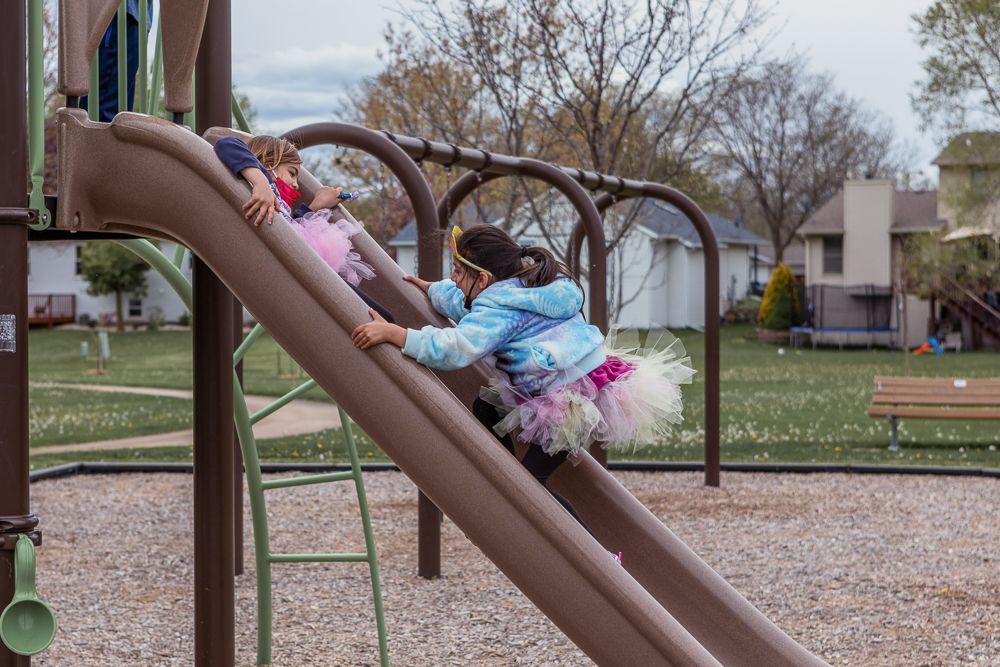
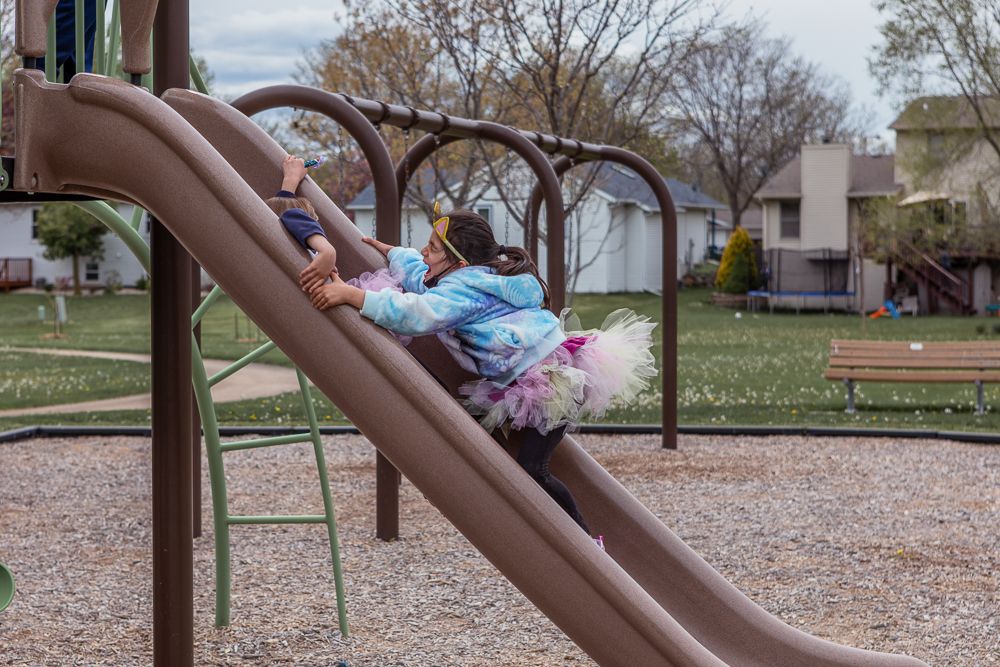
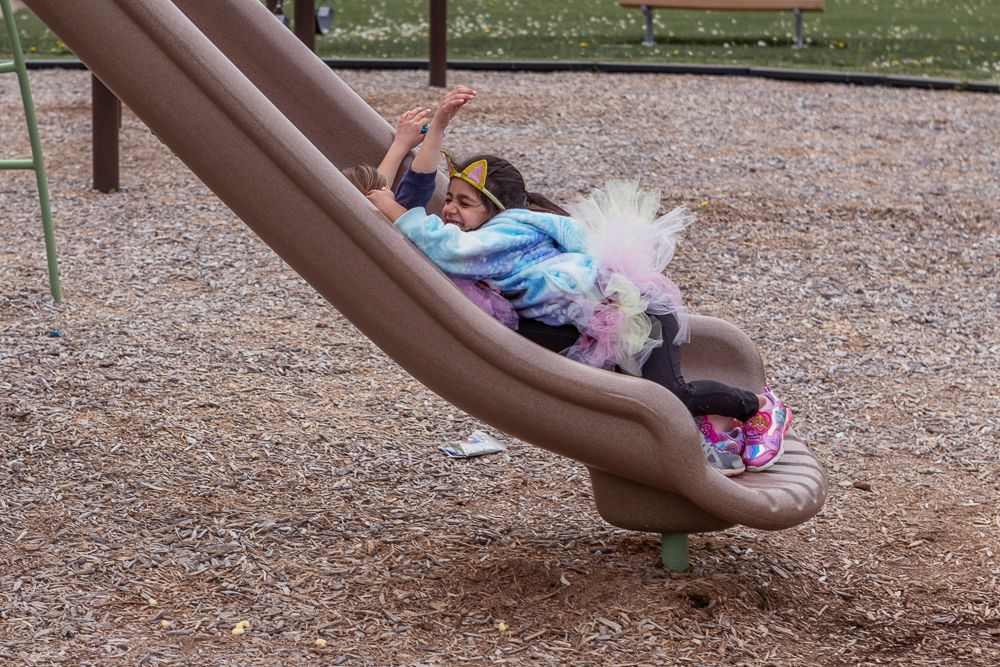
The first image was shot at f/2.8 at 1/800 and an ISO of 100. The lower aperture was needed to give a little more light with such a fast shutter speed.
The second image was shot at f/3.5 with a shutter speed of 1/500 and an ISO of 100.
Adjusting for light can be done with your aperture and ISO here. If you are photographing a race or your daughter's soccer game, and you want to capture one or two people, you can increase your ISO and / or aperture to get more light.
Try This: Shoot in Shutter Priority with motion. Go to a park and have your kids run around. Set your shutter for 1/250 and see what your camera does to compensate for its lighting needs. Then speed it up, and again. Test it out.
Depth of Field
If you want to make your background blurry (less DoF), or get that bokeh look, you need a wider aperture. Remember, aperture is like a door closing, not opening, so the larger aperture, (the smaller number on your camera) say f/1.4, is going to give you more light, and focus on the focal point and nothing else, thus, blurring the background.
If you want your background to be more in focus (larger DoF), with a larger focus area, you would need a smaller aperture, like f/8 or f/11. Smaller apertures are better for group shots and landscape photography. Larger apertures are great for portraits.
Keeping your shutter speed slower and increasing your ISO will give you more light if you need it when using a lower aperture.
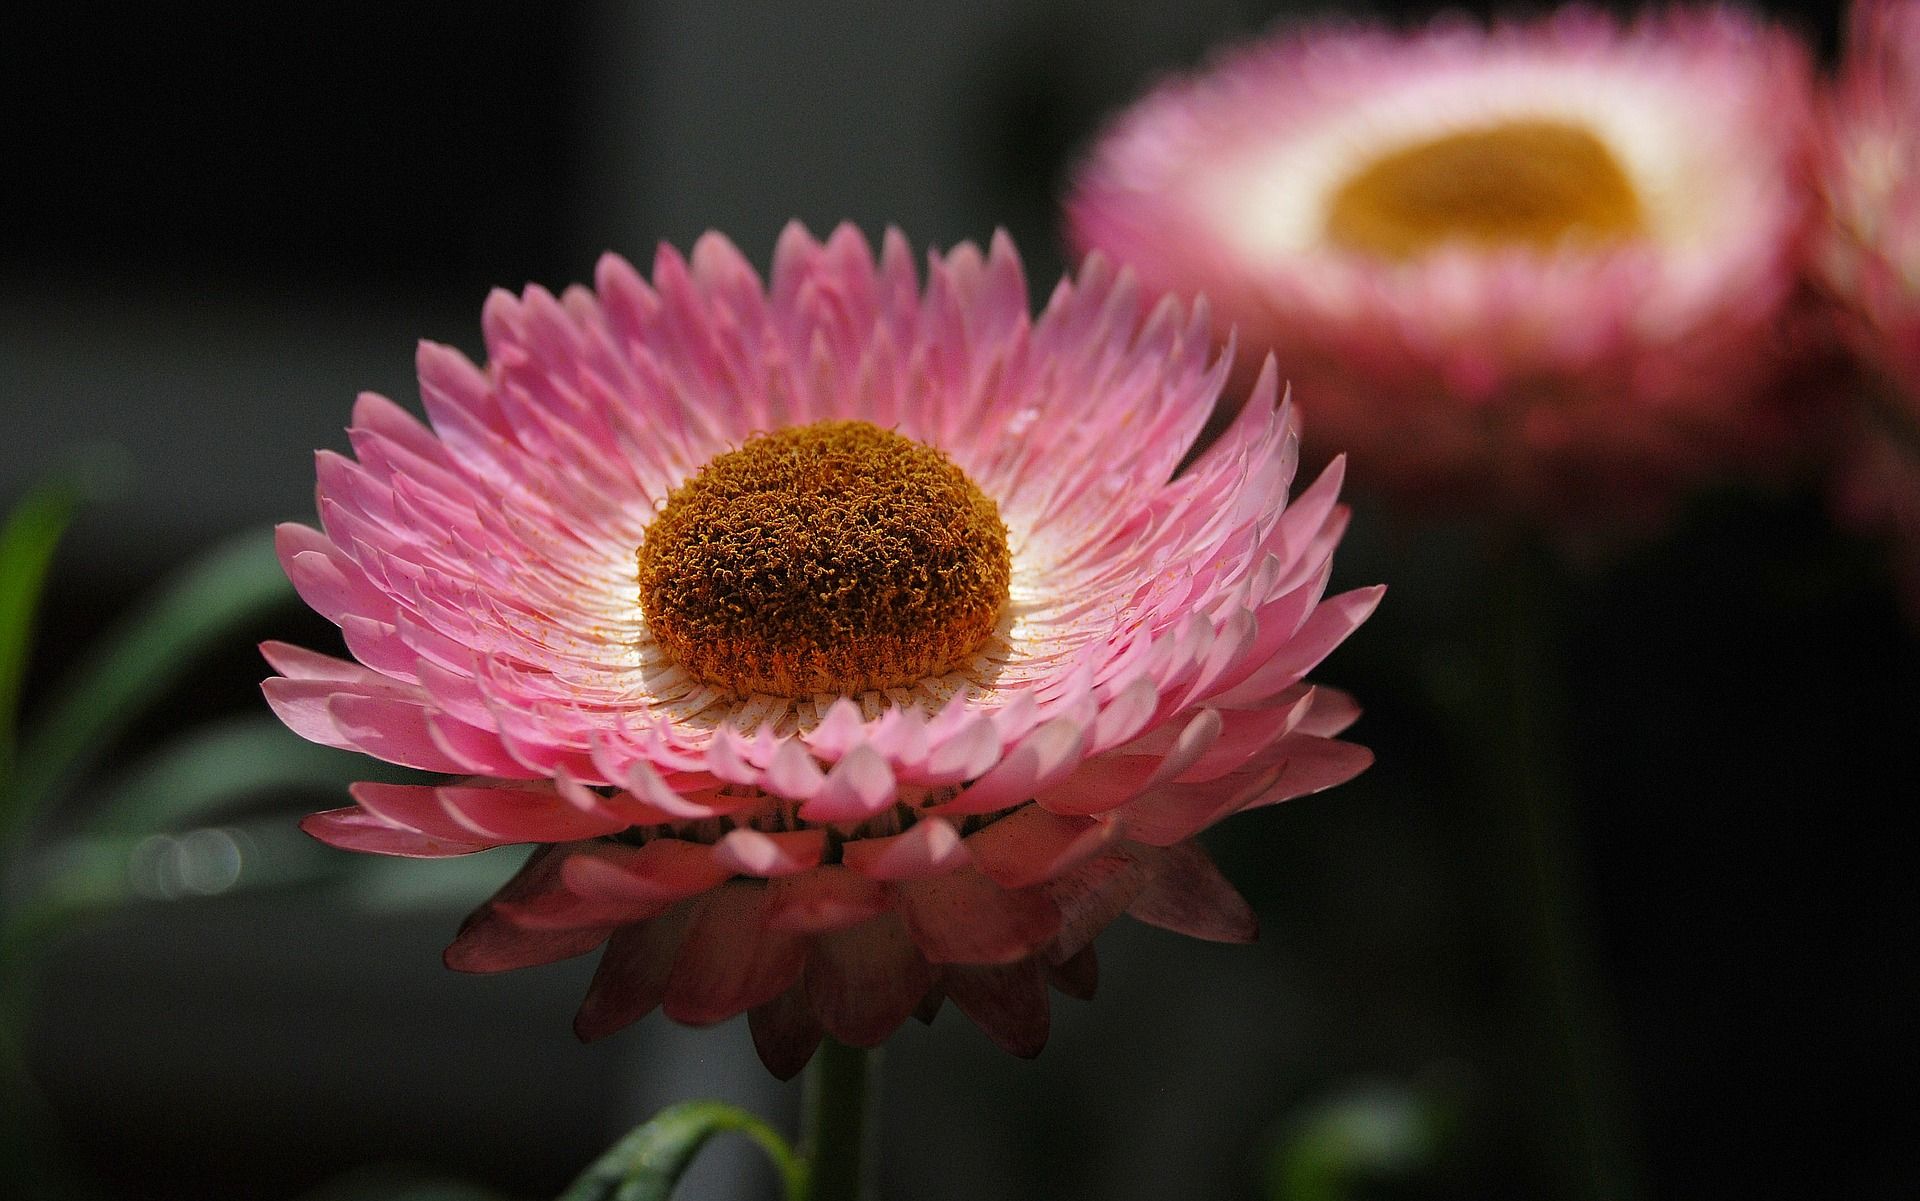
The first image has a small depth of field, the second has a moderate depth of field, and the third has a large depth of field.
Try This: Shoot in Aperture Priority to experiment with depth of field. Go to Olbrich Gardens (or any other garden with flowers) this spring and set your aperture to the highest setting, (the lowest # on your dial) and see what your camera decides for shutter speed and ISO. Then adjust your aperture, one stop at a time. Your camera will adjust the shutter speed and ISO accordingly.
This is also where exposure compensation is useful. Check out your manual to find out how your exposure compensation is expressed, and try it out. Nikon and Canon have different ways it's expressed, and I only know Canan's.
ISO
Remember, ISO is the sensitivity of the sensor to light. You can play around with your ISO, or even leave it on auto, and see what you get. If you’ve set your aperture and shutter to the settings you want, and then see in your display screen your images are too dark, increase your ISO. Your ISO lightens up the entire image. It’s pretty amazing how much this technology has improved in newer cameras, but still be aware of the amount of noise, aka, grain.
I am extremely picky about my ISO, and when I have a client's shoot, I use as low of an ISO as possible, never going above 3200. My camera has a setting that allows me to limit the ISO range, so I can leave the ISO on auto if I chose, and my images would never get too grainy. Even though my camera is capable of capturing images with higher ISOs and still maintain a lower level of noise, I very much dislike any noise in my photos. I prefer crispy, tack sharp images that jumps out at you. Noise dulls that, so I stay as far away from it as I can.
This is not your typical professional photographer’s perspective; many photographers utilize higher ISOs and do very well with it. This is just a personal preference on my end. Try using higher ISOs and lower ISOs and see what you like.

The first image was shot at f/2.2 at 1/250 with an ISO of 3200, the second image was shot at f/6.3 at 1/250 with an ISO of 12800.
In Conclusion
You can get creative with your settings and play around with them. There are many different ways to get the correct exposure. And remember, ‘correct’ is subjective. I tend to underexpose, on purpose, just as a personal preference. I have more room to manipulate highlights and shadows in post when the images are underexposed.
Take a look at your images and the histogram on each one. For learning purposes, you want to have kind of a curve, with the top being fairly centralized. My curve top is usually closer to the left side, indicating underexposure. However, in the studio, I like to have my curve closer to the right side, getting brighter photos SOOC. This makes for less editing in post.
Learning is half the fun with photography. I would love to see what you do with your cameras. Show off some of your images in the comments and tell me about your experiences.
Good luck, and most importantly, have fun!